


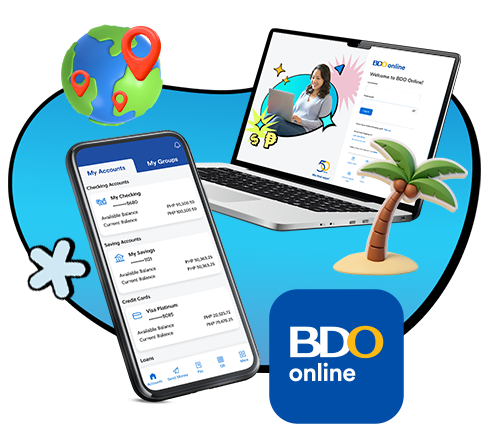


Features

Log In Quickly And Securely
Access BDO Online faster with biometrics or Passcode for convenience without compromising security.
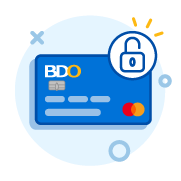
Secure Your Cards
Lock or unlock your BDO Debit or Credit Cards in real-time.


Get Real-time Account Updates
View the status of your transactions so you can track your accounts easier!

Add or Remove Accounts
Choose which of your BDO accounts you want to see and access anytime.
Get started with BDO Online
Frequently Asked Questions
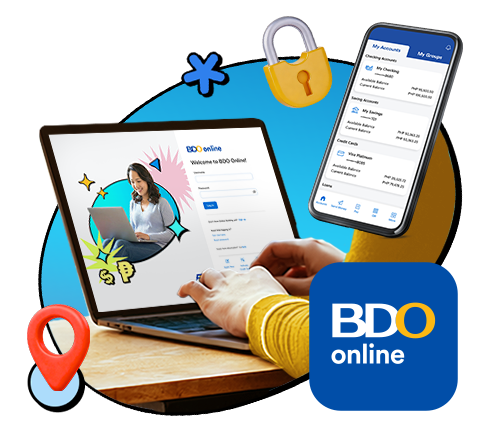
Take control of your accounts and finances with the BDO Online app and website. They let you manage your accounts, keep track of your finances, and make different types of transactions anytime, anywhere with enhanced security.
You can download the BDO Online app for FREE on Google Play Store (Android), the App Store (iOS), or Huawei AppGallery (Harmony OS).
For the BDO Online website, you can access it via this link: www.onlinebanking.bdo.com.ph
If you don’t have a BDO Online Banking account yet, you may sign up using your Savings or Checking account, or Credit Card. Just follow these steps:
- [App] Download the BDO Online app / [Website] Go to www.onlinebanking.bdo.com.ph
- Tap/Click Sign up
- Select Savings or Checking Account
If you only have a BDO Credit Card*, select Credit Card - Fill out the required details, agree to the Terms & Conditions and Data Privacy Consent, then tap/click Next
If signing up from overseas, make sure to tick the “I’m signing up from outside the Philippines.” box - Enter your preferred username and password
- Confirm your password, then tap/click Submit
Once sign-up is successful, you can already log in to the BDO Online app and website.
*For American Express Credit Cards, enter your 4-digit CSC found on the front of your Card in the CVV field.
For those with existing active BDO Online Banking accounts, you can use the BDO Online app and website by following these steps:
App
- Download the BDO Online app on Google Play Store, App Store, or Huawei AppGallery
- Open the BDO Online app and enter your existing username and password
- Enable alternative login methods so you can easily access your account without having to enter your password each time:
a. Biometrics* (Fingerprint/Face)
b. Passcode**
*Biometrics login is dependent on the capability of your device.
**Required to be set up during device registration
Website
- Go to www.onlinebanking.bdo.com.ph
- Enter your existing username and password
- Authenticate your login via these options:
a. Via BDO Online app-registered device- Select Continue to send a notification to your BDO Online app *Please make sure that BDO Online app push notifications are enabled in your device settings.
- Tap the notification on your registered device, then tap Yes if the number matches the one on the BDO Online website screen.
- Confirm your login using your biometrics or Passcode
b. Via One-Time PIN (OTP)
- If you don’t have a BDO Online app-registered device, enter the One-Time PIN (OTP) sent to your registered mobile number to confirm your account, then select Submit.
- If your registered device is not accessible to you, or your BDO Online app push notifications are disabled, select Try another method, then Text me a One-Time PIN (OTP). Enter the One-Time PIN (OTP) sent to your registered mobile number to confirm your account, then select Submit.
You will receive an email and/or SMS notification for every successful login using your username and password.
Enjoy safe and convenient Online Banking with all the features available on the app and website:
- Sign up for a BDO Online Banking account
- Reset password
- Retrieve username
- View account summary (PHP Checking Accounts, PHP and USD Savings Accounts, Time Deposits, PHP, USD and Dual Currency (PHP and USD) Credit Cards, Loans and Trust Accounts)
- View transaction details (Checking and Savings Accounts, Credit Cards and Trust Accounts)
- View and download Statements (Checking Accounts and Credit Cards)
- View and manage account groups
- Send Money to your own account, any other BDO account, or other banks and wallets via InstaPay or PESONet
- Send Money from your own USD to USD account, USD to PHP account, or across the same third currency accounts
- Wire Transfer*
- Schedule and manage money transfers to your own account, any other BDO account or other banks and wallets via InstaPay
- Pay Bills
- Buy Load
- Schedule and manage bills payment and prepaid mobile reload
- Add, Save and Manage Favorites
- Request Money via QR code**
- Withdraw Money via QR code**
- Deposit Money via QR code**
- Add or remove own accounts
- Set Debit Card limits
- Lock or unlock Debit and Credit Cards
- Enable or disable Debit Cards for Overseas Transactions
- Reorder Checkbook and request Stop Payment Order
- Update email address and mobile number
- Credit Card Services (Activate Credit Card, Request Virtual Card, Request for Cash Advance PIN)
- Assign and manage accounts linked to your mobile number
- Manage BDO Online app-registered device*
- Change Passcode**
- Enable or disable biometrics**
- Create or edit account nicknames
- Enable or disable account-related notifications
*Available on the BDO Online website only
**Available on the BDO Online app only
The app may be downloaded and accessed using Android, iOS (iPhone®), and Harmony OS devices. Please make sure that you have the latest OS version (Android 6.0 and up, iOS 14.0 and up or HarmonyOS 2.0 and up) in order to access the BDO Online app.
The latest version of the BDO Online app is:
Android: Version 26.19.1
iOS: Version 26.19.1
Yes, it’s completely free to download the app! Just remember that using the app requires internet connection through free or paid Wi-Fi or mobile data. Some transactions, such as Send Money from your own PHP to own USD account or to other local banks and wallets via InstaPay and PESONet, may charge a small transaction fee.
View our Terms and Conditions here: BDO Online Terms and Conditions
Yes, you just need to use your username and password for the old BDO Online Banking website to log in to the new BDO Online website by following these steps:
- Go to www.onlinebanking.bdo.com.ph
- Enter your existing username and password for the old BDO Online Banking website
- Authenticate your login via these options:
a. Via One-Time PIN (OTP)
If you don’t have a BDO Online app-registered device, enter the One-Time PIN (OTP) sent to your registered mobile number to confirm your account, then select Submit.
b. Via BDO Online app-registered device- If you already have a BDO Online-app registered device, select Continue to send a notification to your BDO Online app
*Please make sure the BDO Online app push notification is enabled on your device settings
- Tap the notification on your registered device, then tap Yes if the number matches the one on the BDO Online website screen
- Confirm your login using your biometrics or Passcode
- If you already have a BDO Online-app registered device, select Continue to send a notification to your BDO Online app
If you are both using the old BDO Online Banking website and the BDO Online and BDO Pay apps, you need to use your existing username and password for the BDO Online and BDO Pay apps to log in to the new BDO Online website. Just follow these steps:
- Go to www.onlinebanking.bdo.com.ph
- Enter your existing username and password for the BDO Online and BDO Pay apps
- Authenticate your login via these options:
a. Via BDO Online app-registered device
i. Select Continue to send a notification to your BDO Online app
*Please make sure the BDO Online app push notification is enabled on your device settings.
ii. Tap the notification on your registered device, then tap Yes if the number matches the one on the BDO Online website screen
iii. Confirm your login using your biometrics or Passcode
b. Via One-Time PIN (OTP)- If you don’t have a BDO Online app-registered device, enter the One-Time PIN (OTP) sent to your registered mobile number to confirm your account, then select Submit.
- If your registered device is not accessible to you, or your BDO Online app push notifications are disabled, select Try another method, then Text me a One-Time PIN (OTP). Enter the One-Time PIN (OTP) sent to your registered mobile number to confirm your account, then select Submit.
Just follow these steps to reset your password:
- [App] On the login page where you need to input your username and password, tap Need help logging in?, then tap I’d like to reset my password
[Website] On the login page, select I’d like to reset my password - Enter your username and the last four (4) digits of your account or card number, then select Next
- Enter the One-Time PIN (OTP) sent to your registered mobile number to confirm your account, [Website] then select Submit
- Set up your new password
- Must have at least 8 characters
- Must contain a lowercase letter
- Must contain an uppercase letter
- Must contain a number
- Must contain a special character (except backslash [\], double quotes [“”] and single quote [’])
- Must not be an old password
Once password reset is successful, you can already use your new password to log in to the BDO Online app and website.
You will receive an email and/or SMS notification for every successful password change.
App
On the login page where you need to input your username and password, tap Need help logging in?, then tap I’d like to get my username, and then enter your registered email address. You will receive instructions on how to recover your username via email.
Website
On the login page, click I’d like to get my username, enter your registered email address, then click Submit. You will receive instructions on how to recover your username via email.
Make sure that the email address and mobile number linked to the account you used to sign up are updated. If you recently changed your contact information, please have your records updated.
For Checking or Savings accountholders:
Visit your Branch of Account
For Credit Cardholders without Checking or Savings account:
Call the BDO Customer Contact Center using any of the following numbers:
Metro Manila: (+632) 8888-0000
Domestic Toll-Free Numbers:
(PLDT and Globelines): #8888-0000
International Toll-Free Number*:
(IAC)+800-8-CALLBDO (2255-236)
*International Toll-Free Numbers Reminder: Charges apply for calls made using a mobile number.
If signing up from overseas, send your documents containing the following to onlineactivation@bdo.com.ph with your reference number as the subject:
- Any valid government-issued ID from the country where you are currently located.
(Must have your photo, full name, date of birth, signature) - A clear photo of you holding up the ID that you submitted in #1.
(ID should be held close to your face, fingers shall not cover any numbers, text, or photos.)
Note: The processing time of BDO Online Banking overseas sign-up is 5-7 banking days from the time your complete documents have been received.
*Once your request to have your records updated has been processed, you may continue with your sign-up by relaunching the BDO Online app or website.
No, you can only have one (1) BDO Online app-registered device.
If you’ve reached the maximum number of allowed registered devices and wish to change to a new one, just log in with your username and password using the new device, enter the One-Time PIN (OTP) sent to your registered mobile number, and nominate a Passcode.
The system will automatically unlink your previously registered device/s once your new device is successfully registered.
Yes, you can use the app and access the website outside the Philippines as long as you have an internet connection.
If your screen turned black while using the app or if the biometrics or Passcode isn't showing up when you log in, try the following:
Close and relaunch the app
If you’re on iOS, swipe up and close the app.
If you’re on Android, tap the Recent button on your navigation bar, close the app, then just relaunch the app from your home screen.
Delete the app from your phone and redownload the latest version on the Play Store, App Store or AppGallery.
If you get logged out immediately and/or receive this notification after logging in to the app, please check your phone settings and make sure the date and time are set automatically.
On your Settings tap General, select Date & Time, then toggle on Set Automatically.
If you continue to experience this, please reinstall your app.
Just follow these steps to update your mobile number:
App
- Once you’re logged in, tap More, then Update Profile
- Tap the arrow beside your mobile number
- Enter your new mobile number, then tap Update
- Enter the One-Time PIN (OTP) sent to your registered email address to confirm your account
Website
- Once you’re logged in, click More, then Update Profile
- Click Update beside your mobile number
- Enter your new mobile number, then click Save
- Enter the One-Time PIN (OTP) sent to your registered email address to confirm your account, then click Confirm
You will get acknowledged when the mobile number is successfully updated.
Just follow these steps to update your email address:
App
- Once you’re logged in, tap More, then Update Profile
- Tap the arrow beside your email address
- Enter your new email address, then tap Update
- Enter the One-Time PIN (OTP) sent to your registered mobile number to confirm your account
Website
- Once you’re logged in, select More, then Update Profile
- Select Update beside your email address
- Enter your new email address, then select Save
- Enter the One-Time PIN (OTP) sent to your registered mobile number to confirm your account
You will get acknowledged when the email address is successfully updated.
Yes, you can block or delete your BDO Online app-registered device. Just follow these steps on the BDO Online website:
To block registered device:
- Once you’re logged in, select More, then Manage Devices
- Select the three-dot icon beside the device you would like to block, then select Block Device
- Select Block to confirm blocking the device
You will get acknowledged when the device is successfully blocked.
To delete registered device:
- Once you’re logged in, select More, then Manage Devices
- Select the three-dot icon beside the device you would like to delete, then select Delete Device
- Select Delete device to confirm device deletion
You will get acknowledged when the device is successfully deleted from your account.
You can also unblock registered device:
- Once you’re logged in, select More, then Manage Devices
- Select the three-dot icon beside the device you would like to unblock, then select Allow Device
- Click Allow to confirm unblocking the device
You will get acknowledged when the device is successfully unblocked.
Just follow these steps to change your Passcode:
- Once you’re logged in, tap More, then Manage Login
- Tap Change Passcode beside Passcode
- Enter your current Passcode
- Set up your new Passcode. Make sure it is non-sequential (e.g., 123456) and non-repeating (e.g., 000000).
- Confirm your newly set Passcode
Once Pasccode change is successful, you can already use your newly set Passcode to log in to the app and confirm your financial transactions.
You will receive an email notification for every successful Passcode change.
Yes, you can enable it after your successful device registration. If your device supports fingerprint or face authentification, just follow these steps to set it up on your BDO Online app:
- Once you’re logged in, tap More, then Manage Login
- Toggle on [iOS] Face ID or Touch ID / [Android] Biometrics, then follow the instructions to set up your biometrics
Yes, if you enabled biometrics as a login and authentication option, anyone whose biometrics is also saved on your device will be able to log in to your BDO Online app and authenticate transactions using your account.
You can manage notifications for the following:
- Balance - Get notified when your account balance is below your specified amount
- Debit and Credit - Get notified when money is debited from or credited to your account
- Transaction Status - Get notified on the status of your transaction
To enable notifications:
- Once you’re logged in, select the bell icon at the [App] upper right corner / [Website] upper right, beside the user profile icon
- On the Notifications screen, select the settings icon at the upper right corner
- On the Manage Notifications screen, select the notification feature you’d like to enable, [Website] then select Manage:
a. Transaction notification – Get notified on your transaction status
b. Account notification – Get notified on your account status and activities
i. Select the account you’d like to enable account notifications
ii. Select if you’d like to enable Balance or Debit and Credit account notifications
To set the amount for Balance notifications:
[App] Tap Amount, enter the amount you’d like to get notified, then tap Save
[Website] Select the pencil icon beside the amount, enter the amount you’d like to get notified, then select the check mark to save
To disable notifications:
- Once you’re logged in, select the bell icon at the [App] upper right corner / [Website] upper right, beside the user profile icon
- On the Notifications screen, select the settings icon at the upper right corner
- On the Manage Notifications screen, select the notification feature you’d like to disable, [Website] then select Manage:
a. Transaction notification – Get notified on your transaction status
b. Account notification – Get notified on your account status and activities
i. Tap the account you’d like to disable account notifications
ii. Select if you’d like to disable Balance or Debit and Credit account notifications
Just follow these steps to view advisories/announcements in the BDO Online app or website:
- Once you’re logged in, select the bell icon at the [App] upper right corner / [Website] upper right, beside the user profile icon
- On the Notifications screen, tap the message you would like to view
You can also view advisories/announcements in the BDO Online website by tapping the envelope icon at the upper right, beside the bell icon.
The BDO Online app and website will automatically display your personal Credit Card and Loan accounts.*
To add your BDO Deposit (Checking and Savings Accounts) and Trust Accounts, follow these steps:
- Once you’re logged in, select More, then Manage Accounts, [App] then Add or Remove Own Account
- Select Add Own Account
- Fill out the required details and agree to the Undertaking, then select Add
- Review the details of your account, then select Confirm or Add another account
- Confirm your transaction:
[App] With Face ID/Touch ID/Fingerprint or by entering your Passcode
[Website] Via your BDO Online app-registered device or by entering the One-Time PIN (OTP) sent to your registered mobile number
To remove accounts, follow these steps:
- Once you’re logged in, select More, then Manage Accounts, [App] then Add or Remove Own Account
- Select the trash bin icon beside the account you would like to remove, then select Remove
You will get acknowledged when the account is successfully removed.
Removed account/s will no longer be viewable on the BDO Online app and website. All scheduled transactions on the removed account/s will also be cancelled in the BDO Online app and website. You will need to add again the deleted account to the BDO Online app and website to be able to view and use it for financial transactions.
You will receive an email notification for every successful removal of account.
*Corporate or business accounts will not be displayed.
All of your hidden accounts will no longer be viewable on the latest version of the app and website. However, you may add again the removed accounts by following these steps:
- Once you’re logged in, select More, then Manage Accounts, [App] then Add or Remove Own Account
- Select Add Own Account
- Fill out the required details and agree to the Undertaking, then select Add
- Review the details of your account, select Confirm or Add another account
- Confirm your transaction:
[App] With Face ID/Touch ID/Fingerprint or by entering your Passcode
[Website] Via your BDO Online app-registered device or by entering the One-Time PIN (OTP) sent to your registered mobile number
Note: Once you successfully logged in to the latest version of the app and website, you will receive an email notification that your hidden accounts were successfully removed.
For security purposes, you need to manually add your Joint OR accounts to your BDO Online app and website to be able to view it on your account dashboard.
Just follow these steps to add your Joint OR account:
- Once you’re logged in, tap More, then Manage Accounts, [App] then Add or Remove Own Account
- Tap Add Own Account
- Fill out the required details and agree to the Undertaking, then tap Add
- Review the details of your account, then select Confirm
- Confirm your transaction:
[App] With Face ID/Touch ID/Fingerprint or by entering your Passcode
[Website] Via your BDO Online app-registered device or by entering the One-Time PIN (OTP) sent to your registered mobile number
You will receive an email notification for every successful addition of account. The added account will be immediately viewable on the account dashboard.
Just follow these steps to view your Sole Proprietorship account:
- Once you’re logged in, select More, then Manage Accounts, [App] then Add or Remove Own Account
- Select Add Own Account
- Fill out the required details and agree to the Undertaking, then select Add
- Review the details of your account, then select Confirm
- Confirm your transaction:
[App] With Face ID/Touch ID/Fingerprint or by entering your Passcode
[Website] Via your BDO Online app-registered device or by entering the One-Time PIN (OTP) sent to your registered mobile number
You will receive an email notification for every successful addition of account. The added account will be immediately viewable on the account dashboard.
Just follow these steps to add your Trust accounts:
- Once you’re logged in, select More, then Manage Accounts, [App] then Add or Remove Own Account
- Select Add Own Account
- Fill out the required details and agree that all your active Trust accounts* will be visible in the app, then select Add
- Confirm your transaction:
[App] With Face ID/Touch ID/Fingerprint or by entering your Passcode
[Website] Via your BDO Online app-registered device or by entering the One-Time PIN (OTP) sent to your registered mobile number
*Only active accounts or accounts with balance will be added/viewable in the BDO Online app and website.
Yes, you can view and download your Checking Account or Credit Card Statements using the BDO Online app and website. Just follow these steps:
- Once logged in, tap/click Accounts to see all your accounts
- Tap/Click the account you would like to view or download your eSOA, then tap/click Statements
For Checking Accounts, you can also view the scanned copy of your processed cheques by tapping Cheques on the Statements screen - Choose the month and year you would like to view
- [App] Tap the share icon / [Website] Click the printer icon at the upper right corner to save or download
Yes, you can create groups for your accounts displayed on your Accounts page. Here’s how:
- Once you’re logged in, tap/click My Groups tab under Accounts, then Create group
- Enter group name, choose group color, and select the accounts you would like to be in the group, then tap/click Save
You will get acknowledged once you have successfully created and can already view your account groups.
You may display your account groups in List or Gallery view.
Just follow these steps to edit a group in your account listing:
- Once logged in, select My Groups tab under Accounts to view all of your account groups, then select Edit
- Select the pencil icon on the specific group that you would like to edit
- Enter new details, then select Update
To delete a group in your account listing, just follow these steps:
- Once logged in, select My Groups tab under Accounts to view all of your account groups, then select Delete
- Select the bin icon on the specific group that you would like to delete
- Select Delete to confirm deletion
You will get acknowledged every time you edit or delete a group in your account listing.
You may also rearrange your account groupings, here’s how:
- Once logged in, tap/click My Groups tab under Accounts to view all of your account groups, then tap/click Arrange
- Tap/Click and hold the group to drag to the desired arrangement
- Tap/Click Save to save changes
Yes, you can use your mobile number to receive money for your account. Just assign an account to your registered mobile number. Here’s how:
- Once logged in, tap/click More, [App] then Manage Accounts
- Tap/Click Assign an Account to a Mobile Number, then select the account that you would like to assign
- Enter the required details, then tap/click Assign
- Enter the One-Time PIN (OTP) sent to your registered mobile number to confirm
You will get acknowledged when the account is successfully assigned to your registered mobile number.
You will receive an email notification for every successful assignment of an account to your mobile number.
Note: Assigning an account to your registered mobile number will only let you receive money from participating banks or wallets. Sending money to a mobile number is not yet available.
To update the assigned account to your registered mobile number, just follow these steps:
App
- Once you’re logged in, tap More, then Manage Accounts
- Tap Assign an Account to a Mobile Number, then select the new account that you would like to assign to your mobile number, then tap Update
- Enter the One-Time PIN (OTP) sent to your registered mobile number to confirm
Website
- Once you’re logged in, click More, then Assign Account to Mobile Number
- Click Edit, then select the new account that you would like to assign to your mobile number, then click Update
- Enter the One-Time PIN (OTP) sent to your registered mobile number to confirm
You will get acknowledged when the new account is successfully assigned to your registered mobile number.
To remove the assigned account to your mobile number, just follow these steps:
App
- Once you’re logged in, tap More, then Manage Accounts
- Tap Assign an Account to a Mobile Number, then Remove
- Tap Remove to confirm
Website
- Once you’re logged in, click More, then Assign Account to Mobile Number
- Click Edit, then Remove
- Click Remove to confirm
You will get acknowledged when the assigned account is successfully unlinked from your registered mobile number.
You will receive an email notification for every change on/removal of the assigned account to your mobile number.
Note: Assigning an account to your registered mobile number will only let you receive money from participating banks or wallets. Sending money to a mobile number is not yet available.
No, you need to remove first the assigned account to your old mobile number, then assign again any of your accounts to your new mobile number.
To remove assigned accounts to your mobile number, just follow these steps:
App
- Once you’re logged in, tap More, then Manage Accounts
- Tap Assign an Account to a Mobile Number, then Remove
- Tap Remove to confirm
Website
- Once you’re logged in, click More, then Assign Account to Mobile Number
- Click Edit, then Remove
- Click Remove to confirm
You will get acknowledged when the assigned account is successfully unlinked from your old mobile number.
Once the assigned account is unlinked from your old mobile number, you can now assign your new mobile number to any of your accounts. Here’s how:
- Once logged in, tap/click More, [App] then Manage Accounts
- Tap/Click Assign an Account to a Mobile Number, then select the account that you would like to assign
- Enter the required details, then tap/click Assign
- Enter the One-Time PIN (OTP) sent to your registered mobile number to confirm
You will get acknowledged when the account is successfully assigned to your registered mobile number.
Note: Assigning an account to your registered mobile number will only let you receive money from participating banks or wallets. Sending money to a mobile number is not yet available.
Yes, you can reorder check booklets using the BDO Online app and website. Just follow these steps:
- Once logged in, tap/click More, then Checkbook Services
- Tap/Click Reorder Checkbook
- Enter required details, then tap/click Reorder
- Review your request details, then tap/click Confirm
- Confirm your transaction:
[App] With Face ID/Touch ID/Fingerprint or by entering your Passcode
[Website]Via your BDO Online app-registered device or by entering the One-Time PIN (OTP) sent to your registered mobile number - You may Save Image or Share the successful transaction confirmation page.
Notes:
- You can get your checkbook from your branch of account. For Metro Manila, within 8-10 banking days, while for provincial areas, within 10-14 banking days.
- Authorized representatives must provide an authorization letter on the date of pick up.
Yes, you can request to cancel your check payments using the BDO Online app and website. Just follow these steps:
- Once logged in, tap/click More, then Checkbook Services
- Tap/Click Stop Payment Order
- Fill out the required details, then tap/click Continue
- Review your request details, agree with the Terms & Conditions, then tap/click Confirm
- Confirm your transaction:
[App] With Face ID/Touch ID/Fingerprint or by entering your Passcode
[Website] Via your BDO Online app-registered device or by entering the One-Time PIN (OTP) sent to your registered mobile number - You may Save Image or Share the successful transaction confirmation page.
Notes:
- This service is available from 9:00 AM to 5:00 PM only.
- A service fee of PHP 200 per check will be charged for every successful stop payment order request.
- Check must be 6 months from issuance and has not been negotiated.
- The validity of the Stop Payment request is 6 months from the date it was made. A new Stop Payment Order application for renewal must be completed upon the lapse of the 6-month period.
Just follow these steps to set nicknames for your accounts:
App
- Once you’re logged in, tap Accounts at the bottom of the screen to see all your accounts
- Tap the account you’re creating a nickname for, then tap Details to see the complete account information
- Tap the pencil icon beside Account Nickname
- Enter your preferred account nickname, then tap Save
Website
- Once you’re logged in, select Manage Accounts under My Accounts tab
- Select the pencil icon beside the account name
- Enter your preferred account nickname, then select the check mark to save
You will get acknowledged when the nickname is successfully saved.
Yes, you can temporarily lock your card to block any transactions. Just follow these steps to lock your Debit or Credit Card:
- Once you’re logged in, select More, then Manage Cards
- Choose the Debit or Credit Card that you would like to lock, then toggle on Lock Card
You will get acknowledged when the Debit or Credit Card is successfully locked.
You can also unlock your card so you can use it for your transactions. Just follow these steps to unlock your Debit or Credit Card:
- Once you’re logged in, select More, then Manage Cards
- Choose the Debit or Credit Card that you would like to unlock, then toggle off Lock Card
- Confirm your transaction:
[App] With Face ID/Touch ID/Fingerprint or by entering your Passcode
[Website] Via your BDO Online app-registered device or by entering the One-Time PIN (OTP) sent to your registered mobile number
You will get acknowledged when the Debit or Credit Card is successfully unlocked.
You will receive an email notification for every successful locking or unlocking of card.
Yes, just follow these steps to set limits on your debit card:
- Once logged in, select More, then Manage Cards
- Select the debit card that you would like to change the daily spending limits, [App] tap Set Daily Card Limits / [Website] under "Set Daily Card Limits", select Edit
- You can set daily card limits for the following:
a. ATM Withdrawals – Cash withdrawal limit via ATM
b. PIN-based Purchases – In-store purchases that require a signature or PIN
c. No-PIN Purchases – Online purchases or in-store purchases that don’t require a PIN
d. Online Purchases – Sub-limit of No-PIN purchases - Once done setting your daily limits, select Update
- Confirm your transaction:
[App] With Face ID/Touch ID/Fingerprint or by entering your Passcode
[Website] Via your BDO Online app-registered device or by entering the One-Time PIN (OTP) sent to your registered mobile number
You will get acknowledged when the debit card limits are successfully updated.
You will receive an email notification for every successful change on your debit card limits.
Yes, you can temporarily block your debit card for foreign and converted-currency transactions. Just follow these steps:
- Once you’re logged in, tap/click More, then Manage Cards
- Choose the card that you would like to disable overseas transactions for, then toggle on Disable Overseas Transactions
You will get acknowledged when the Debit Card is successfully disabled for overseas transactions.
You can also enable your debit card so you can use it for overseas transactions. Just follow these steps:
- Once you’re logged in, tap/click More, then Manage Cards
- Choose the card that you would like to enable, then toggle off Disable Overseas Transactions
- Confirm your transaction:
[App] With Face ID/Touch ID/Fingerprint or by entering your Passcode
[Website] Via your BDO Online app-registered device or by entering the One-Time PIN (OTP) sent to your registered mobile number
You will get acknowledged when the Debit Card is successfully enabled for overseas transactions.
You will receive an email notification for every successful disabling and enabling of debit card for overseas transactions.
Yes, just follow these steps to activate your credit card:
- Once you’re logged in, either:
a. Tap/Click Accounts to see all your accounts, then tap/click Activate Card on the credit card that you would like to activate
b. Tap/Click More, then Manage Cards. Select the card that you would like to activate, then tap/click Activate card - Enter required details, then select Activate
- Confirm your transaction:
[App] With Face ID/Touch ID/Fingerprint or by entering your Passcode
[Website] Via your BDO Online app-registered device or by entering the One-Time PIN (OTP) sent to your registered mobile number
You will receive a notification when your Credit Card is successfully activated.
Yes, just follow these steps to request for a Virtual Card:
- Once you’re logged in, either:
a. [App and Website] Select More, then Service Requests. Choose Credit Card Services, then select Get a Virtual Card.
b. [Website] On the My Accounts page, select the credit card that you would like to request for a Virtual Card, then choose Get Virtual Card - Enter required details, then select Apply
- Confirm your transaction:
[App] With Face ID/Touch ID/Fingerprint or by entering your Passcode
[Website] Via your BDO Online app-registered device or by entering the One-Time PIN (OTP) sent to your registered mobile number
To check the status of your request, just follow these steps:
- Once you’re logged in, select More, then Service Requests
- Select View Request Status, then select the request to view
You will receive a notification to confirm that your request has been either approved or rejected. To get updates, make sure to enable Transaction Status notifications in the BDO Online app and website.
Notes:
- Only the Principal Cardholder may request for a Virtual Card
- Only one (1) Virtual Card may be requested per Credit Card
Yes, just follow these steps to request for a a Cash Advance PIN for your Credit Card:
- Once you’re logged in, either:
a. On the My Accounts page, select the credit card that you would like to request for a Cash Advance PIN, then [App] tap Manage Cards > Request for Cash Advance PIN / [Website] select Request for Cash Advance PIN
b. Select More, then Manage Cards. Select the credit card that you would like to request for Cash Advance PIN, then select Request for Cash Advance PIN.
c. Select More, then Service Requests. Select Credit Card Services, then choose Request for Cash Advance PIN. - Enter required details, then select Request
- Confirm your transaction:
[App] With Face ID/Touch ID/Fingerprint or by entering your Passcode
[Website] Via your BDO Online app-registered device or by entering the One-Time PIN (OTP) sent to your registered mobile number
To check the status of your request, just follow these steps:
- Once you’re logged in, select More, then Service Requests
- Select View Request Status, then select the request to view
You will receive a notification to confirm that your request has been either approved or rejected. To get updates, make sure to enable Transaction Status notifications in the BDO Online app and website.
The Cash Advance PIN will be sent to your registered billing address within 3 to 5 banking days for Metro Manila, and 7 to 10 banking days for outside Metro Manila.
Just follow these steps to Send Money using your account number:
- Once you’re logged in, select Send Money
- Choose the transaction type:
a. Own account - Send to your own BDO account
b. Any BDO account - Send to another person’s BDO account
c. Other banks and wallets - Send to other local banks and mobile wallets via InstaPay or PESONet*
d. Wire Transfer** - Send to other local and foreign banks from your US Dollar account - Choose the schedule type*** and fill out the required details, then select Send
- Review your details, then:
[App] tap Confirm to send immediately or Schedule to schedule the transaction for later or as recurring
[Website] select Confirm to proceed to authorizing your transaction, or select Edit to go back to the previous page and update your transaction details as necessary
- Confirm your transaction
[App] With Face ID/Touch ID/Fingerprint or by entering your Passcode
[Website] Via your BDO Online app-registered device or by entering the One-Time PIN (OTP) sent to your registered mobile number
After a payment, you can select Favorite at the [App] lower right corner (beside Save Image and Share) / [Website] upper right corner (beside Print) of the success screen to save your receiver details. Next time you pay, just select from your favorite receivers so that you don’t need to enter the details anymore.
You can also Send Money via QR (via the BDO Online app only). Just follow these steps:
- Once you’re logged in, tap QR, then Send Money
- Choose the transaction type:
a. [iOS] Upload QR Code from Photos / [Android] Upload QR code from Gallery - Import the QR code from your Photos or Gallery
b. Scan QR code - Scan the QR code of the destination account - Fill out the required details, then tap Send
- Review your details, then tap Confirm
- Confirm your transaction with Face ID/Touch ID/Fingerprint or by entering your Passcode
You can Send Money to any of the following:
- Your own other BDO PHP, USD, or third currency Savings or Checking Accounts (same currency transfer or USD to PHP)
- Another person’s BDO PHP, USD or third currency Savings or Checking Account*
- Other local banks and mobile wallets via InstaPay or PESONet**
- Other local or foreign banks via Wire Transfer***
You can Send Money to other banks and wallets via InstaPay or PESONet using the recipient’s account number by following these steps:
- Once you’re logged in, select Send Money, then Other Banks and Wallets
- Select the Send to field, choose whether to Send Money via InstaPay or PESONet, then select your recipient’s bank
a. InstaPay – Send Money real-time of up to PHP 50,000
b. PESONET* – Send Money up to PHP 500,000 on the same day** - Choose the schedule type*** and fill out the other required details, then tap Send. For PESONet transactions, make sure to provide the receiver’s complete first name and last name.
- Review your details, then:
[App] tap Confirm to send immediately or Schedule to schedule the transaction for later or as recurring
[Website] select Confirm to proceed to authorizing your transaction, or choose Edit to go back to the previous page and update your transaction details as necessary
Scheduled Send Money transactions to other banks and wallets are only available for InstaPay transfers. - Confirm your transaction:
[App] With Face ID/Touch ID/Fingerprint or by entering your Passcode
[Website] Via your BDO Online app-registered device or by entering the One-Time PIN (OTP) sent to your registered mobile number
*Covers personal accounts only.
**Transactions made after 3:00 PM, on weekends and holidays will be processed on the next banking day.
*** “Now” to send money immediately, “Later” or “Recurring” to schedule the transaction for later or as recurring. Scheduled transactions are only available for Send Money to other banks and wallets via InstaPay.
You can also Send Money to other banks and wallets via InstaPay using the recipient’s QR code (via the BDO Online app only). Just follow these steps:
- Once you’re logged in, tap QR, then Send Money
- Choose the transaction type:
a. [iOS] Upload QR Code from Photos / [Android] Upload QR code from Gallery - Import the QR code from your Photos or Gallery
b. Scan QR code - Scan the QR code of the destination account - Fill out the required details, then tap Send
- Review your details, then tap Confirm
- Confirm your transaction with Face ID/Touch ID/Fingerprint or by entering your Passcode
Transactions made on or before 3:00 PM will be processed on the same day. Transactions made after 3:00 PM, on weekends, and holidays will be processed on the next banking day.
The actual crediting of funds to the receiver’s account depends on the receiving bank’s processing schedule.
You can Send Money to another US Dollar account of a local or foreign bank using your USD Savings account via Wire Transfer* by following these steps:
- Once you’re logged in, select Send Money, then Wire Transfer
- Select Other Local Bank or Foreign Bank
- Fill out the required details**, then select Send.
For transactions bound for Europe and Middle East countries, indicate the International Bank Account Number (IBAN) in the Beneficiary account number. - Review transaction details, then select Confirm
- Confirm your transaction via your BDO Online app-registered device or by entering the One-Time PIN (OTP) sent to your registered mobile number, then select Submit
Upon successful submission of Wire Transfer request, the amount to be sent, service fees, and remittance charges (if any), will be debited from your account; while funds will be credited to the recipient account within 3-5 banking days if transaction details have no discrepancies. The transaction/request date is already counted as 1 banking day, if the request was made on or before 12 PM.
You can save the receiver’s details as a favorite to make future Send Money transactions easier. Just follow these steps after sending money:
- On the success screen of your Send Money to Any BDO account or Send Money to Other banks and wallets transaction, select Favorite at the [App] lower right corner (beside Save Image and Share) / [Website] upper right corner (beside Print)
- Enter your preferred Favorite nickname, then select Save
- You will get acknowledged when the details are successfully saved to favorites
- On your next transaction, just tap the favorite receivers you wish to Send Money to
You can also add them manually through these steps:
- Once you're logged in, select More, then Manage Favorites
- Select Send Money to Any BDO Account, Send Money to Other Banks and Wallets or Send Money via Wire Transfer*
- Select Add Favorite, [App] or the + icon at the upper right corner
- Enter the required details, then select Save
You will get acknowledged when the newly added Send Money recipient is successfully saved to favorites.
*Available on the BDO Online website only
To edit the details of your saved Send Money recipient, just follow these steps:
- Once you’re logged in, tap/click More, then Manage Favorites
- Tap/Click Send Money to Any BDO Account, Send Money to Other Banks and Wallets or Send Money via Wire Transfer*
- Choose the favorite receiver you would like to update, then tap/click Edit
- Enter the new details, then tap/click Save
You will get acknowledged when the updated details are successfully saved to favorites.
To delete a receiver from your favorites, just follow these steps:
- Once you’re logged in, tap/click More, then Manage Favorites
- Tap/Click Send Money to Any BDO Account, Send Money to Other Banks and Wallets or Send Money via Wire Transfer*
- Choose the favorite receiver you would like to permanently delete, then either:
a. [App] Swipe left on the chosen receiver, then tap X, or
b. [App and Website] Tap/Click the receiver, then Delete - Tap/Click Delete to confirm the deletion of saved favorite
*Available on the BDO Online website only
Here are the daily transaction limits* for Send Money:
- To own BDO account
a. PHP to PHP, USD to USD or same third currencies – up to your available balance
b.USD to PHP – USD 5,000** - To another person's BDO account***
a. PHP to PHP - PHP 500,000
b. Other currencies – depends on the currency (see Limits and Fees - Send Money to Any BDO Account (Same Foreign Currency)) - To other local banks and mobile wallets***
a. Via InstaPay - PHP 50,000****
b. Via PESONet – PHP 500,000***** - To other local banks or foreign banks via Wire Transfer****** – up to your available balance
| To Other Local Bank |
Recipient | USD 10.00 |
Remittance and other charges may be charged to Recipient by the receiving bank | USD 10.00 |
| To Foreign Bank |
Recipient | USD 10.00 |
Remittance and other charges may be charged to Recipient by the receiving bank | USD 10.00 |
| To Foreign Bank |
Sender or Remitter |
USD 10.00 |
Remittance charge of USD 25.00 per Wire transfer | USD 35.00 |
- Once you’re logged in, click Send Money, then Wire Transfer
- Select Wire Transfer Transaction Status
Yes, you can Send Money from your own USD account to your own PHP account.
Send Money via Cash Pick-up and Door-to-Door can no longer be done as the old BDO Online Banking website is no longer available.
Use instead the BDO Online app or website to enjoy the following services for FREE (no more PHP 100 service fee!).
- Send Money to any BDO account, and receivers can withdraw from more than 5,800 ATMs using their Debit Card or from the 12,000 Cash Agad agent locations nationwide.
- Generate a QR on the BDO Online app to send to your receivers, and they can scan it at any BDO QR-enabled ATM nationwide to withdraw cash.
Otherwise, you can Send Money via InstaPay (PHP 10) or PESONet (PHP 50).
Just follow these steps to Pay Bills:
- Once you’re logged in, select Pay, then Pay Bills
- Select or search the biller you would like to pay to
- Choose the schedule type* and fill out the required details, then select Pay
- Review your details, then:
[App] tap Confirm to pay immediately or Schedule to schedule the transaction for later or as recurring
[Website] select Confirm to proceed to authorizing your transaction, or select Edit to go back to the previous page and update your transaction details as necessary - Confirm your transaction:
[App] With Face ID/Touch ID/Fingerprint or by entering your Passcode
[Website] Via your BDO Online app-registered device or by entering the One-Time PIN (OTP) sent to your registered mobile number
After a payment, you can select Favorite at the [App] lower right corner (beside Save Image and Share) / [Website] upper right corner (beside Print) of the success screen to save your biller details. Next time you pay, just select from your favorite billers so that you don't need to enter the details anymore.
* “Now” to pay immediately, “Later” or “Recurring” to schedule the transaction for later or as recurring.
No, enrolled billers in the old BDO Online Banking website will not reflect in the BDO Online app and website. You can save the biller details as a favorite to make your future Pay Bills transactions easier.
Just follow these steps to save your favorite billers:
- Make a payment to your biller
- On the success screen of your Pay Bills transaction, select Favorite
- Enter your preferred Favorite nickname, then select Save
- You will get acknowledged when the details are successfully saved to favorites
- On your next transaction, just select the favorite biller you wish to pay bills
You can also add them manually through these steps:
- Once you’re logged in, select More, then Manage Favorites
- Select Pay Bills
- Select Add Favorite, [App] or the + icon at the upper right corner
- Enter required details, then select Save
You will get acknowledged when the newly added billers are successfully saved to favorites.
You can save the payment details as a favorite to make your future Pay Bills transactions easier. Just follow these steps after paying bills:
- On the success screen of your Pay Bills transaction, select Favorite at the [App] lower right corner (beside Save Image and Share) / [Website] upper right corner (beside Print)
- Enter your preferred Favorite nickname, then select Save
- You will get acknowledged when the details are successfully saved to favorites
- On your next transaction, just select the favorite biller you wish to pay bills.
You can also add them manually through these steps:
- Once you’re logged in, select More, then Manage Favorites
- Select Pay Bills
- Select Add Favorites, [App] or the + icon at the upper right corner
- Enter required details, then select Save
You will get acknowledged when the newly added biller is successfully saved to favorites.
To edit the details of your saved biller, just follow these steps:
- Once you’re logged in, tap/click More, then Manage Favorites
- Tap/Click Pay Bills
- Choose the favorite biller you would like to update, then tap/click Edit
- Enter the new details, then tap/click Save
You will get acknowledged when the updated details are successfully saved to favorites.
To delete a biller from your favorites, just follow these steps:
- Once you’re logged in, tap/click More, then Manage Favorites
- Tap/Click Pay Bills
- Choose the favorite biller you would like to permanently delete, then either:
a. [App] Swipe left on the chosen biller, then tap X
b. [App and Website] Tap/Click the biller, then tap/click Delete - Tap/Click Delete to confirm the deletion of saved favorite
BDO Credit Card payments made via BDO Online, ATMs, and Cash Deposit Machines will be reflected within the same banking day. Payments to all other billers made after 10 PM are considered next banking day transactions.
Pay your bills for utilities, credit cards, investments, loans, tuition, and more!
To view the full list of billers, visit Pay Bills > Partner Billers
None. Pay Bills is free of charge!
Pay Bills transactions for some billers are only accepted until 10 PM. Transactions made after the cut-off time will be rejected. For future payments, make sure to do them before 10 PM.
Just follow these steps to Buy Load:
App
- Once you’re logged in, tap Pay, then Buy Load
- Enter the mobile number you are buying load for or tap the address book icon to search for the mobile number from your phonebook. Make sure that the mobile number is in the 11-digit format (e.g., 09123456789).
- Choose the network provider of the mobile number, then tap Buy
- Choose the schedule type* and fill out the other required details, then tap Buy
- Review your details, then tap Confirm to buy immediately or Schedule to schedule the transaction for later or as recurring
- Confirm your transaction with Face ID/Touch ID/Fingerprint or by entering your Passcode
After payment, you can tap Favorite at the lower right corner of the success screen to save your receiver details. Next time you pay, just select from your favorite receivers so that you don’t need to enter the details anymore.
Website
- Once you’re logged in, select Pay, then Buy Load
- Choose the schedule type* and fill out the required details, then select Buy
- Review your details, then select Confirm to proceed to authorizing your transaction, or select Edit to go back to the previous page and update your transaction details as necessary
- Confirm your transaction via your BDO Online app-registered device or by entering the One-Time PIN (OTP) sent to your registered mobile number
After payment, you can select Favorite at the upper right corner of the success screen to save your receiver details. Next time you pay, just select from your favorite receivers so that you don’t need to enter the details anymore.
* “Now” to pay immediately, “Later” or “Recurring” to schedule the transaction for later or as recurring.
You can Buy Load for prepaid mobile numbers under the following network providers: Smart, TNT, Sun, Globe, TM, and DITO.
You can save the recipient's mobile number and provider details as a favorite to make your future Buy Load transactions easier. Just follow these steps after buying prepaid load:
- On the success screen of your Buy Load transaction, select Favorite at the [App] lower right corner (beside Save Image and Share) / [Website] upper right corner (beside Print)
- Enter your preferred Favorite nickname, then select Save
- You will get acknowledged when the details are successfully saved to favorites
- On your next transaction, just select the favorite receiver you wish to buy load for
You can also add them manually through these steps:
- Once you’re logged in, select More, then Manage Favorites
- Select Buy Load
- Select Add Favorite, [App] or the + icon at the upper right corner
- Enter required details, then select Save
You will get acknowledged when the newly added receiver’s mobile number is successfully saved to favorites.
To edit the details of your saved mobile number, just follow these steps:
- Once you’re logged in, select More, then Manage Favorites
- Select Buy Load
- Choose the favorite mobile number you would like to update, then select Edit
- Enter the new details, then select Save
You will get acknowledged when the updated details are successfully saved to favorites.
To delete a mobile number from your favorites, just follow these steps:
- Once you’re logged in, select More, then Manage Favorites
- Select Buy Load
- Choose the favorite mobile number you would like to permanently delete, then either:
a. [App] Swipe left on the chosen mobile number, then tap X
b. [App and Website] Select the mobile number, then select Delete - Select Delete to confirm the deletion of saved favorite
Just follow these steps to Send Money via QR*:
- Once you’re logged in, tap QR, then Send Money
- Choose the transaction type:
a. [iOS] Upload QR Code from Photos / [Android] Upload QR code from Gallery - Import the QR code from your Photos or Gallery
b. Scan QR code - Scan the QR code of the destination account - Fill out the required details, then tap Send
- Review your details, then tap Confirm
- Confirm your transaction with Face ID/Touch ID/Fingerprint or by entering your Passcode
*Available on the BDO Online app only
Just follow these steps to Request Money via QR*:
- Once you’re logged in, tap QR, then Request Money
- Fill out the required details, then tap Generate QR
- You may Save Image or Share the QR code generated
*Available on the BDO Online app only
Generate a QR code using the BDO Online app, then use the generated QR code to withdraw.
Just follow these steps to Generate QR code:
- Once you’re logged in, tap QR, then Withdraw Money
- Fill out the required details, then tap Generate QR
- You may Save Image or Share the QR code generated*
*Generated QR code is valid for 30 minutes
Just follow these steps to Withdraw via QR*:
- Generate a QR code on your BDO Online app
- Go to any QR-enabled BDO ATM (located in selected BDO branches), then tap QR Code Transaction on the screen
- Scan your QR code and wait for the transaction to be completed
*Available on the BDO Online app only
Generate a QR code using the BDO Online app, then use the generated QR code to Deposit Money to your Own Account or to Any BDO Account.
To Deposit Money via QR to Own Account or to Any BDO Account, just follow these steps:
- Once you’re logged in, tap QR, then Deposit Money
- Tap Own Account or Any BDO Account
- Fill out the required details, then tap Generate QR
- Review your details, then tap Confirm
- You may Save Image or Share the QR code generated*
*Generated QR code is valid for 24 hours
Just follow these steps to Deposit via QR*:
- Generate a QR code on your BDO Online app
- Go to any BDO Universal Teller Machine (located in selected BDO branches), then tap QR Code Transaction on the screen
- Scan your QR code, then put the cash in the bin
- Review and confirm your cash deposit summary, then wait for the transaction to be completed
*Available on the BDO Online app only
The following Credit Card, Loan, Branch, and Remittance Services are also available in the BDO Online app and website.
Credit Card
- Request for Credit Card Re-delivery
- Dispute a Transaction
- Check Credit Card Application Status
- Get an Additional Credit Card
- Get a Supplementary Card
- Installment Offers:
- Cash Installment
- Purchase Convert
- Balance Convert
- Balance Transfer
Loan - Loan Client Request
Branch - Branch Appointment
Remittance - Remit Status Inquiry
Note: You will be redirected to the BDO website for these services.
Yes, you may still change or cancel your scheduled transactions at least one day before the scheduled payment.
To change the details of your scheduled transactions, just follow these steps:
- Once you’re logged in, select Send Money for Send Money transactions or Pay for Pay Bills or Buy Load transactions, then View Scheduled
- Choose the specific transaction type to update:
a. [Send Money] Own Account, Any BDO Account, or Other Banks and Wallets
b.[Pay] Pay Bills or Buy Load - Choose the specific scheduled transaction you would like to update, then select Edit
- Enter the new details, then select [Send Money] Send / [Pay Bills or Buy Load] Pay
- Review your details, then select Schedule
- Confirm your transaction:
To cancel your scheduled transactions, just follow these steps:
- Once you’re logged in, select Send Money for Send Money transactions or Pay for Pay Bills or Buy Load transactions, then View Scheduled
- Choose the specific transaction type to cancel:
a. [Send Money] Own Account, Any BDO Account, or Other Banks and Wallets
b. [Pay] Pay Bills or Buy Load - Choose the specific scheduled transaction you would like to cancel, then select Delete
- Select Delete to confirm the cancellation of scheduled transaction
Yes, Send Money and Buy Load transactions on the BDO Online app and website are debited in real time.
For Pay Bills, the amount is also debited from your account in real time, but the posting date of payment varies according to the merchant biller.
The date reflected in your transaction history is the posting date of your transaction. This may differ from your transaction date. Transactions made during weekends and holidays will be part of the transactions on the next banking day.
Your transaction is still being processed. You will receive a notification to confirm that your transaction is either successful or unsuccessful. To get updates on the status of your transaction, make sure to enable notifications for Transaction Status in the BDO Online app and website.
Cash Cards can no longer be used. Cash Card holders can visit any BDO branch to exchange their Cash Card for a FREE BDO Pay Card.
The bank employs these strict security requirements for the BDO Online app and website:
- The system has multi-factor authentication.
a. [App] Device Registration
b. [App and Website] One-Time PIN (OTP) for login and certain transactions
c. [Website] Authenticate login and certain transactions via push notification in the BDO Online app
d. [App] Passcode for login and certain transactions
e. [App] Biometrics for login and certain transactions - The system uses trusted security certificate to secure customer data.
- The system does not store sensitive account information on your phone. This includes information like account numbers, card numbers, password etc.
No, BDO does not recommend sharing devices to access different Online Banking accounts. Once a device has been linked to a user, only that user can use that device to access their BDO Online Banking account. If another user accesses the same device and successfully logs in, that user removes the binding of the device and the original user.
Metro Manila Number: (+632) 8888-0000
Domestic Toll-Free Numbers:
(PLDT and Globelines): #8888-0000
International Toll-Free Number*:
(IAC)+800-8-CALLBDO (2255-236)
*International Toll-Free Number Reminder: Charges apply for calls made using a mobile number.
Effective April 1, 2025 in accordance with the BSP Circular 1195:
Yes. BDO complies with the regulations set forth by the BSP.
InstaPay
“Within 1 hour from the receipt of the sender’s payment instruction”
When you Send Money to other banks and wallets via InstaPay through BDO’s digital channels, your transaction is routed through BancNet, as BSP’s designated clearing switch operator for InstaPay. The 1-hour processing time begins once BancNet receives the transaction, validates it on their and the receiving bank’s end, and sends a response back to BDO.
PESONet
“Within 2 hours from the receipt of the settlement report by the bank or e-money issuer”
When you Send Money to other banks and wallets via PESONet through BDO’s digital channels, your transaction is routed through the Philippine Clearing House Corporation (PCHC), as BSP’s designated clearing switch operator for PESONet. The 2-hour processing time begins once BDO generates a settlement report for your transaction (i.e. timed-out transactions) or receives a settlement report from PCHC for the rejected or returned transactions.
Transactions made on or before 3:00 PM will be processed on the same day. Transactions made after 3:00 PM, on weekends, and holidays will be processed on the next banking day.
You may also refer to the table below for the detailed processing breakdown of PESONet transactions when made through the BDO digital channels:
| For unsuccessful Transations | ||||
|---|---|---|---|---|
| Transaction Time | Processed Starting at | Crediting to beneficiary by Receiving Bank* | If transaction is deemed unsuccessful during BDO's batch processing, expect funds to be returned by | If transaction is deemed unsuccessful during PCHC's batch processing or Receiving Bank's batch processing, expect funds to be returned by |
| 12:00 AM - 9:00 AM | 10:00 AM same day | 1:00 PM same day | 4:00 PM same day | 4:00 PM same day |
| 9:01 AM - 12:00 PM | 1:00 PM same day | 4:00 PM same day | 4:00 PM same day | 7:00 PM same day |
| 12:01 PM - 3:00 PM | 4:00 PM same day | 7:00 PM same day | 7:00 PM next banking day | 1:00 PM next banking day |
| 3:01 PM - 11:59 PM | 10:00 AM next banking day | 1:00 PM next banking day | 1:00 PM next banking day | 4:00 PM next banking day |
| Weekends and Holidays | 10:00 AM next banking day | 1:00 PM next banking day | 1:00 PM next banking day | 4:00 PM next banking day |
*The actual crediting of funds to the receiver’s account depends on the receiving bank’s processing schedule.
InstaPay
Make sure you input the correct details of your recipient. If confirmed correct but the intended recipient did not receive the amount sent, the funds should be automatically returned to your account within one hour. If the funds are still not returned after one hour, we will automatically investigate your transaction. While it is being checked, monitor both source and destination accounts. The debited amount should be reversed or posted within three banking days from the transaction date.
PESONet
Make sure you input the correct details of your recipient. If confirmed correct but the intended recipient did not receive the amount sent*, the funds should be automatically returned to your account within two hours*. If the funds are still not returned after two hours, we will automatically investigate your transaction. While it is being checked, monitor both source and destination accounts. The debited amount should be reversed or posted within three banking days from the transaction date.
*Dependent on the batch processing schedule
Yes, a transaction may not be successfully credited or crediting may be delayed due to the following reasons:
a. BDO’s connection is temporarily unavailable.*
b. BancNet (InstaPay) or PCHC (PESONet) is experiencing downtime or unstable.*
c. The receiving bank’s connection is down not available or slow to respond.
d. The receiving bank rejected the transaction (e.g., the account number does not exist).
*Return of funds is dependent on system availability. Monitor both source and destination accounts. The debited amount should be reversed or posted within three banking days from the transaction date.
Immediately report unrecognized or unauthorized transactions by calling the BDO Contact Center at (+632) 8888-0000.
Once InstaPay and PESONet transaction details are confirmed by the sender, the transaction is considered final and cannot be cancelled. If funds are sent to the wrong beneficiary account, call the BDO Contact Center so we can help coordinate with the receiving bank. Please note that refunds are not guaranteed especially if the erroneous account number provided is a valid account.
For assistance with InstaPay or PESONet transactions, please contact the BDO Contact Center at (+632) 8888-0000.
